
Tuesday, 22 January 2013
WELCOME MINI COOPER
I just completed this baby quilt for a friend at work. She is expecting a baby boy so I had to go with the blue colour. Her last name is "Cooper", hence the silhouette of the car on the front. The title of this quilt had to be Welcome Mini Cooper.

Thursday, 17 January 2013
HEART OF MY HEART
Is it too early for Valentine's Day? I hope not. The Halton Hills Quilters' Guild will be showing Valentine themed quilts at the January meeting. I have many, many, many Christmas quilts but so few Valentine quilts. I tried to rectify that by making a wall hanging which was completed in a couple hours. I riffled through my stash of bits and pieces and pulled some reds and whites. The scraps were cut into small squares, placed on a piece of backing and batting, and quickly machine stitched all over.

Tuesday, 15 January 2013
CONE FLOWERS ALL IN A ROW
I spent a good portion of my weekend making more postcards for the various groups to which I belong.
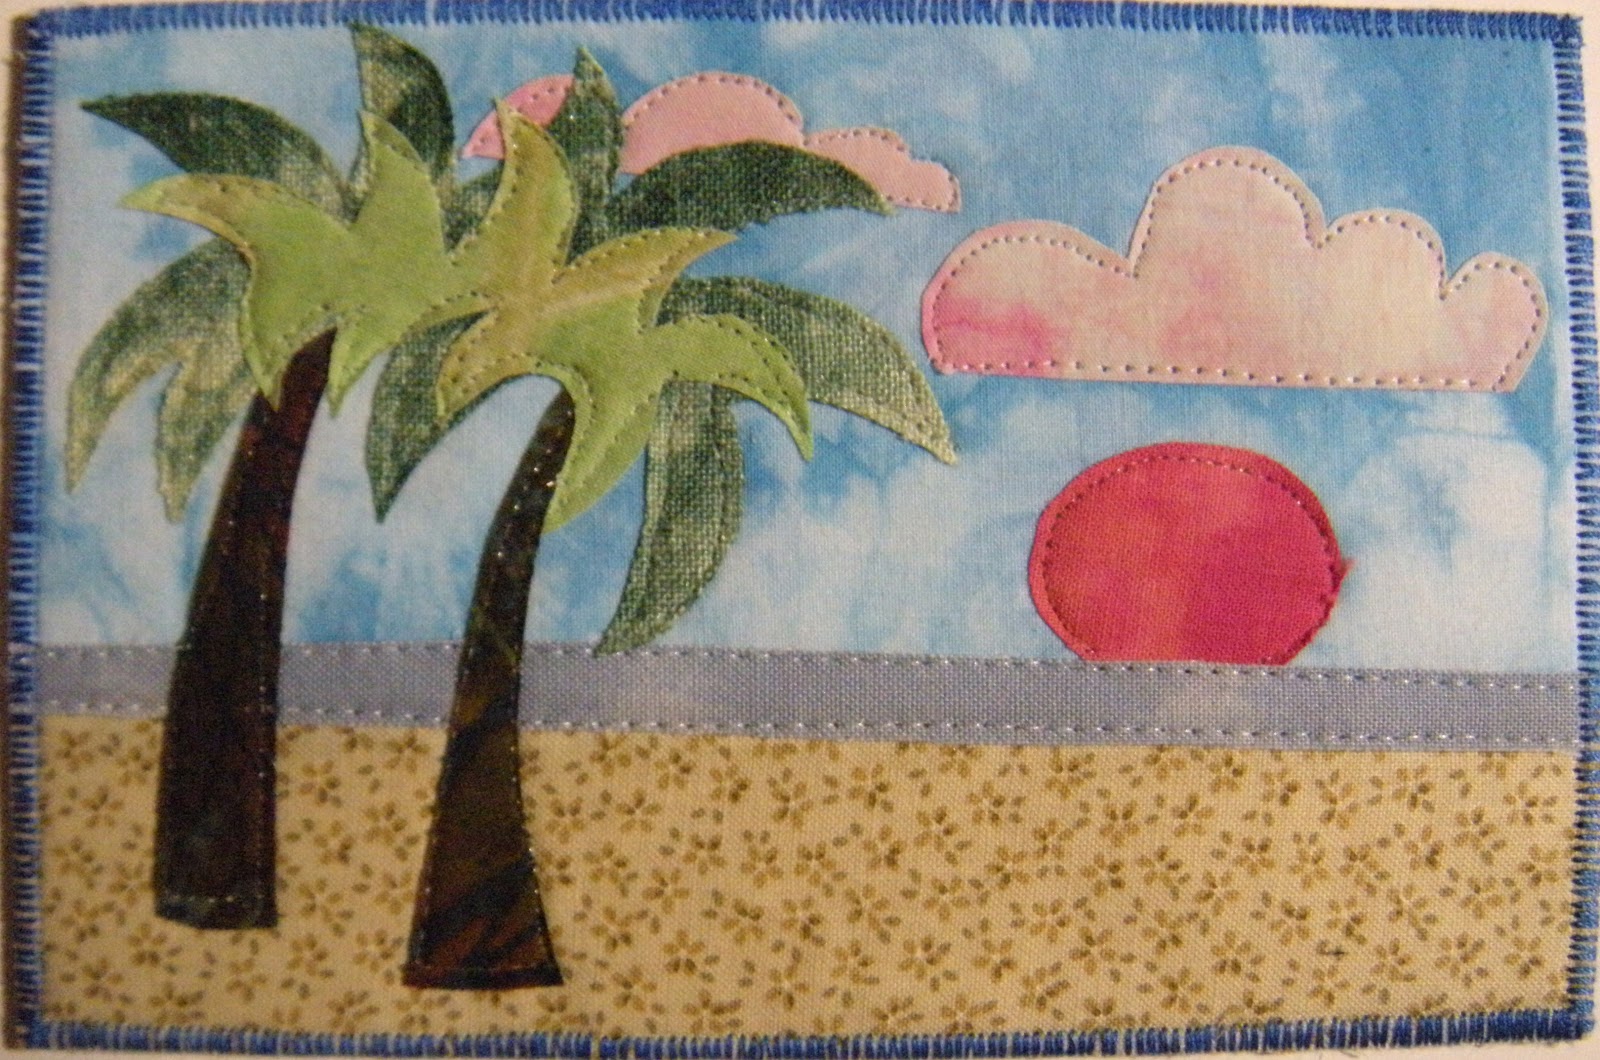
January's theme is The Sea Shore. I just received this one from Barbara in Ohio.


Instead of procrastinating, I made next month's cards as well. February's theme is Flowers and out of all the flowers in the world I chose to depict the corn flower. I know this flower not because it grows in my garden (actually not much grows in my garden), but because it grows profusely in my sister's garden. I belong to several groups and wanted to send the flower to each member. That meant that I needed to make 18 post cards. The background was made from small pieces of fabric stitched to a muslin backing.


January's theme is The Sea Shore. I just received this one from Barbara in Ohio.

I made five of each of these using a fusible raw-edge applique method.


Next I made some stamps from old styrofoam meat containers. I stamped the petals and centre using bronze and purple acrylic paint on a hand-dyed square of pale green. I let the paint dry and mounted the squares on the pieced background, along with a dark green stem.

Each step was completed 18 times.

Next, I free-motion stitched around each petal.


Then using monofilament thread, the pale green square and stem were stitched in place, and the whole card was bound in a close zig-zag.


I'm happy with myself that these were completed and I even sent them to their recipients in the post today!
Saturday, 12 January 2013
BLUE OR GREEN WALK TRIPTYCH
I love the colour blue. I have lots of blue fabric stash, blue yarn, blue wool, blue beads, blue quilts - you get the idea. After being given a basket full of blue "stuff", I was challenged to do something with it. Each lunch hour I go for a walk and along the way find many objects. I tend to pick up the odd piece of junk and put it in my pocket for later use. Here, I've added both the blue "stuff" and green (repurposed) junk.


Pieces of blue strips were cut up and pieced at random, then quilted. I then stitched a piece of picked-up junk to the centre of each square, then secured it with a cover of light tulle. Each blue quiltlet was then tacked to the white backing. Here is a close up of the first column of quiltlets.


Here is the second column.


And the third column.


I tried to use only materials that I had on hand. Nothing was purchased to complete the project. I wanted an old pipe to use as a hanging rod, but I couldn't find one long enough so I ended up using an old shower curtain rod instead.
Friday, 11 January 2013
HINDSIGHT
As part of a recent Group of Eight challenge, I completed an ATC that had been hanging around for a while. Hindsight - is it 20/20?

I used Photoshop to merge the horse and clock images. Text was added later. The clear button was added to bring attention to the hind-end of the horse.
Thursday, 10 January 2013
POSTCARD POSSIBILITIES
Oh, how I love making postcards. They are the perfect size to try out a new technique or stitch. I was encouraged to use, in any way, some of the "blue" items that were given to me as a thank-you gift. Among the blue items was a small baggie containing make-up remover pads that had been dyed predominantly blue. The pad layers could be peeled apart, revealing different colouring throughout each pad.
I placed the pads on hand-dyed fabric backing and covered them with tulle. Stitching was added around each pad and the extra tulle was cut away. Each postcard was backed and bound with a close zig-zag.
I placed the pads on hand-dyed fabric backing and covered them with tulle. Stitching was added around each pad and the extra tulle was cut away. Each postcard was backed and bound with a close zig-zag.


The background fabric of this card was made using a rice flour resist and acrylic paint,

while the background of this card was made from part of a drop cloth. A big blue button was added.


Tuesday, 1 January 2013
HAPPY NEW YEAR
HAPPY NEW YEAR TO YOU!
The past couple days have been filled with art. As one of my New Year's resolutions, I've been trying to use only what I have on hand. That means that I couldn't go out and buy anything in order to complete my projects. I'm fortunate to have lots of "product" available. A couple weeks back I did some marbling of fabric. I used a couple of those pieces as a base for these works. Each piece was layered with ink and paint, then stamped, stitched and even beaded.
This one has been stretched over a frame, ready for hanging.

I cut this one up into pieces to be used as wall art, postcards and ATC's.

This is a tiny 3"x3" framed picture.

Three postcards - for an exchange.


ATC's:


From my family to yours, best wishes for health and happiness in 2013 and may it be artfully productive!
STICK SANTA
During the holiday break I was busy making a "Stick Santa" (pattern by Happy Hollow Designs).


It was pretty simple to put together, but time consuming. Here's what I did. I started by cutting up 1 3/8" squares of fabric from my stash.

Then the squares were placed on a fusible grid. I used June Tailor Quilt Top Express because that's what I had at home. There are many types of fusible grid available. Use what's on hand.

I made two sections as it was easier to handle and the fusible grid wasn't long enough.

After all the pieces were laid out, it was pressed to "fuse" everything in place. Next, the vertical seams were sewn,

and then the seam allowances were clipped between each row.

Each row was pressed to one side.

Horizontal seams were then stitched and pressed.

The two segments were then sewn together.

I don't like cutting into large pieces of batting for small projects so scraps of left over batting were pieced together to a size large enough to fit. The top, batting and backing were layered and held together with pins.

The quilting was stitched a scant 1/4 inch from each seam line.

This shows the quilting from the back as it's difficult to see the red thread on the red pieced background.


After the quilting was complete eye and belt buttons were stitched on. The piece was folded in half lengthwise, right sides together, and stitched from top to bottom, then turned inside out, ready for slipping over a tube. Embellishments were added to complete Santa.
Subscribe to:
Posts (Atom)