The tag was printed on label paper and applied to card stock. The card stock was scored, folded and stapled to a small bag filled with noses. The hardest part was picking out the brown and red "noses" from the M&M bulk bin.
Monday, 16 December 2013
REINDEER NOSES
I'm always looking for neat, inexpensive, gift ideas for co-workers. This year I came across this Pinterest post:
Saturday, 14 December 2013
SECRET KRIS KRINGLE
This year, at the office, 24 of us are participating in a secret Kris Kringle exchange. We all draw names and spend up to $15 on a naughty or nice, but not needed, gift.
Here's the gift that I put together: Movie Night at Home
Here's the gift that I put together: Movie Night at Home
I found a Frosty the Snowman hat shaped wicker basket in my basement crawl space. I filled it with some Laura Secord Hot Chocolate mix (purchased on Black Friday for half the cost), a couple Dollar Store mugs dressed with sweaters, Smart Food Popcorn (again on sale) and "The Family Stone" (a seasonal feel-good flick) DVD (from the $5 bin at Walmart).
I tied it all up together in cellophane with a black bow and chalkboard card.
Now I just have to sneak it under the tree without anyone seeing me.
Thursday, 12 December 2013
PRIMITIVE GATHERINGS
Oh my! What a long time it took to complete this stocking. A little while ago I posted some of the pieces in progress. Here it is complete.
To give credit where credit is due, this was actually a pattern designed by Joanne Blank and Lisa Bongean for Primitive Gatherings, www.primitive gatherings.us. If you feel up to it, give them a shout out at info@primitivegatherings.us and ask for a copy of the pattern. The instructions were pretty vague, but understandable, even for a novice stitcher like me.
Tuesday, 10 December 2013
CIRCLES
This is going to be the last creation in a postcard exchange group to which I belong. The theme is circles.
This piece was created using a circle stencil and black Shiva paint sticks on bleached muslin. Right now, it's drying on my design wall. Within the week, I'm going to add some machine quilting and hand stitching then cut it up into smaller pieces to create a few postcards. I hope they turn out.
This piece was created using a circle stencil and black Shiva paint sticks on bleached muslin. Right now, it's drying on my design wall. Within the week, I'm going to add some machine quilting and hand stitching then cut it up into smaller pieces to create a few postcards. I hope they turn out.
Sunday, 8 December 2013
WOODSY HANGERS
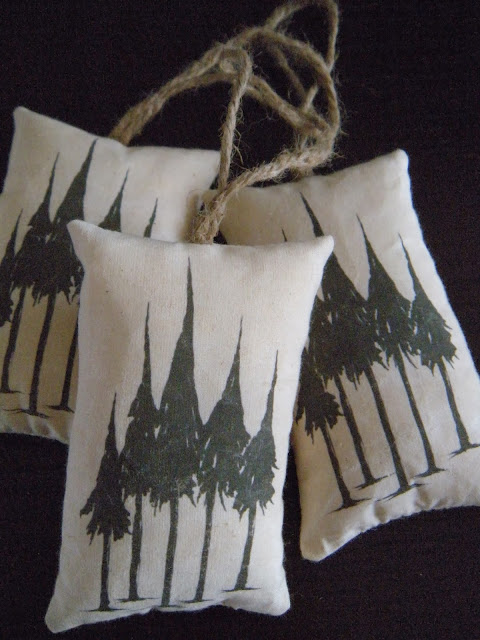
I have a small Christmas tree that is decorated in a "woodsy" theme. This year I spruced it up by adding some hand-made pillow ornaments.
You too could make these - all you need is some free clip art, muslin fabric, Lesley Riley's Transfer Artist Paper, iron, twine (I used garden twine and since I don't garden I have plenty), stuffing and thread. Print the images onto the Transfer Paper. Transfer the images to muslin, using a hot iron. Cut out each design and match it to a plain piece of muslin. Before stitching around the outside to form the tiny pillow, place the twine inside to form a hanger. Stitch around the perimeter of the pillow, leaving a small opening for turning. Turn the piece right sides out, stuff with polyester fibre and whip stitch the opening closed.
You too could make these - all you need is some free clip art, muslin fabric, Lesley Riley's Transfer Artist Paper, iron, twine (I used garden twine and since I don't garden I have plenty), stuffing and thread. Print the images onto the Transfer Paper. Transfer the images to muslin, using a hot iron. Cut out each design and match it to a plain piece of muslin. Before stitching around the outside to form the tiny pillow, place the twine inside to form a hanger. Stitch around the perimeter of the pillow, leaving a small opening for turning. Turn the piece right sides out, stuff with polyester fibre and whip stitch the opening closed.
Thursday, 5 December 2013
NO PLACE LIKE HOME FOR THE HOLIDAYS
I've spent the better part of two days decorating the house for the Christmas season. Every year I go with a theme colour. This year it's green and grey. In an earlier post, I showed you the outside entry way. Here is the inside:
I usually have a quilt hanging at the front door, but I didn't have one in keeping with the colour theme. I did have one, however, with greens on the back so I hung it with the back out.
Last year I made the NOEL ornaments and thought that they would be perfect for the rustic tree.
I put up another tree in the living room. It has a bit more glam.
Quite a few of the ornaments came from the Dollar Store and Walmart. The look kind of cheap on their own, but when hung with a multitude of others, they show very well.
I won this table centre piece at my company Holiday Party. Talk about lucky. It fits right in with my theme.
Wednesday, 4 December 2013
SNOWMAN KISSES
I spent a few hours this past weekend making Snowman Kisses. My sister did this last year for the family and I thought it was an awesome idea. It makes a relatively inexpensive give-away for a company function.
I started with Tic Tacs . . .
There you have it. Done!
I started with Tic Tacs . . .
Then I printed the cover. Google www.creationsbykara.com for the download. There are literally hundreds of variations on the theme out there.
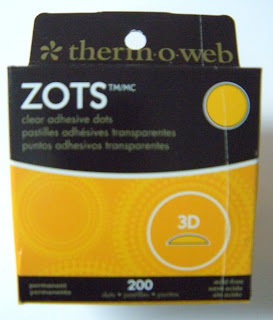
I wanted to make something quick and easy so instead of applying ribbon to tie the piece together, I applied a couple Zots (adhesive dots) on the inside of the cover.
Then adhered the Tic Tacs to the mounted Zots.
There you have it. Done!
Monday, 2 December 2013
MORE POSTCARDS
Sunday, 1 December 2013
GROUP OF EIGHT SHOW
Yesterday morning, five members from the Group of Eight Fibre Artists hung a show at the Unitarian Congregation in Mississauga. It took a couple hours, but looks great.
Subscribe to:
Comments (Atom)


